


XTools Pro Catalog
#updated
Purpose
XTools Pro Catalog is a dual-pane data manager for ArcGIS Pro. It utilizes the dual-pane approach to data management well-known from the traditional file managers (e.g., Norton Commander or Total Commander) and brings their benefits to spatial data management in ArcGIS.
With XTools Pro Catalog you can have two different workspaces open simultaneously side-by-side. As a result, many operations may be performed easier with this approach - for example, when copying or moving data between workspaces you can see both the source and destination workspaces at the same time. Besides, while working with data and browsing workspaces in the XTools Pro Catalog panels you can use advanced sorting, filtering, selections and multiple preview windows (for both feature geometry and attributes).
Description
XTools Pro Catalog consists of two main windows (panels), a menu, a toolbar on the top, and a button bar at the bottom. Only one of the panels is active at a time. The active panel is highlighted by the color line above the panel. Feature classes in the active panel serve as the source of operations performed by the manager. For example, feature classes can be copied or moved from the active panel to the workspace shown in the passive panel.
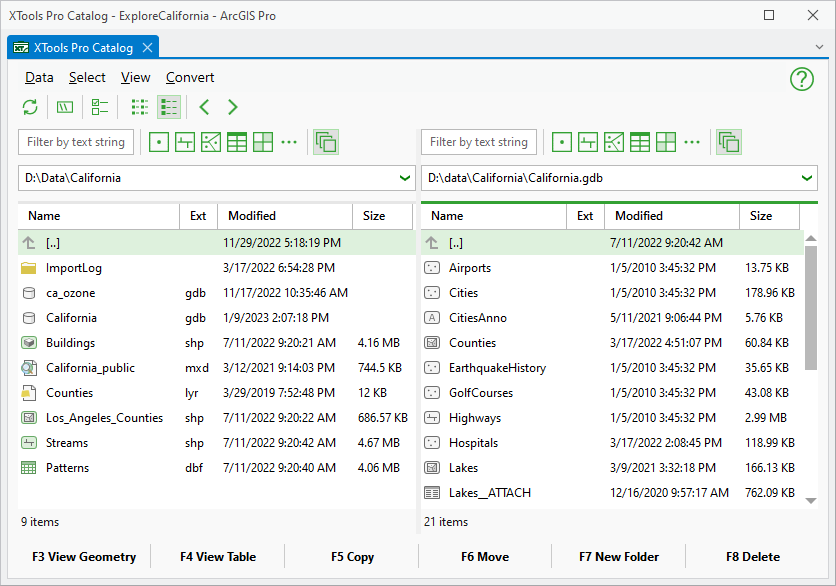
As a dockable window, XTools Pro Catalog can be placed conveniently anywhere in ArcGIS Pro and resized as required.
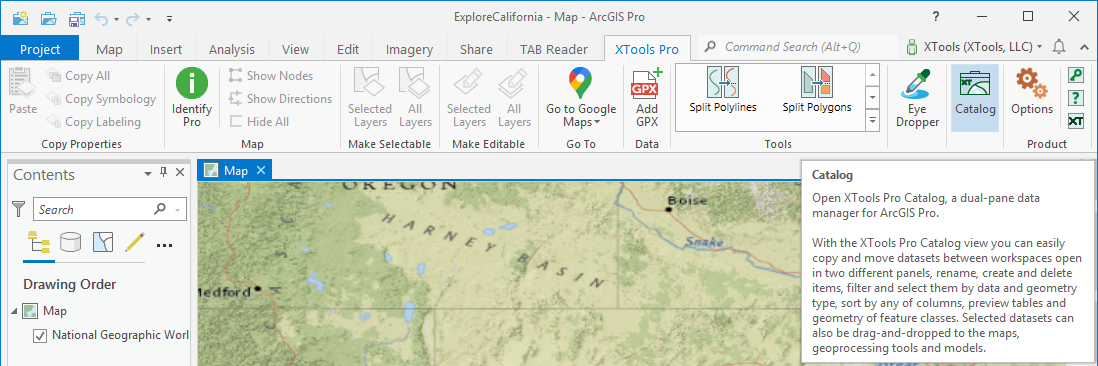
You can open XTools Pro Catalog from XTools Pro tab in ArcGIS Pro project or use a separate ArcGIS Pro configuration (a shortcut to the XTools Pro Catalog configuration is available from the Programs menu).
Managing data with XTools Pro Catalog
Browsing workspaces
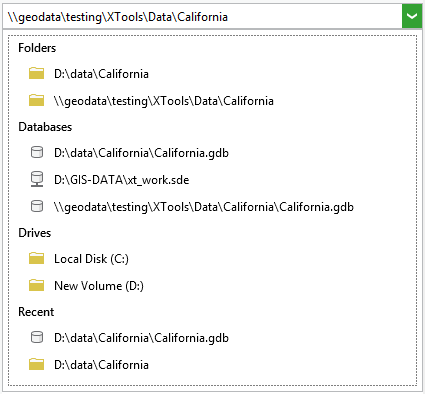
The data panels are the main part of the XTools Pro Catalog. They may show the same or two different workspaces. By default, the current project folder is shown in one panel and the project geodatabase is shown in another one. You can go to other workspaces selecting them from the drop-down list with the workspaces, getting inside disk folders, moving up the folder tree or using the Back and Forward buttons.
The following workspace types are available for quick browsing:
-
Folders
- Connected folders. -
Databases
- Connected geodatabases. -
Drives
- Local and connected disk drives. -
Recent
- Recently used folders and geodatabases.
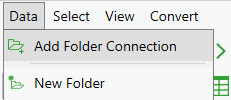
New folder connections can be added to the list using the Add Folder Connection command of Data menu on the top of XTools Pro Catalog.
The path to the current workspace shown in the panel is displayed above each panel. The paths are editable so you can type the required path for navigation and paths can be copied and pasted.

You can easily get back and switch between the previously used workspaces
during one Catalog session using the Back
or Forward buttons  on the toolbar.
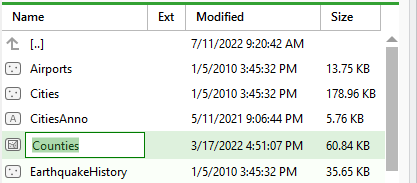
Panel view modes
Each panel supports two view modes:
-
Full View
- Name, Extension, Modified date and Size columns are displayed for every item in current workspace. This mode is selected by default. -
Brief View
- Only Name and Extension columns are displayed. Contents of Modified date and Size columns are hidden, although you can still sort item by these columns.
You can change the view mode of the
active panel using the Full View and Brief View buttons
 on
the toolbar or commands of the View menu.
on
the toolbar or commands of the View menu.
At that, you can refresh the list of the items in the active panel using the Refresh button on the toolbar or command in the View menu.
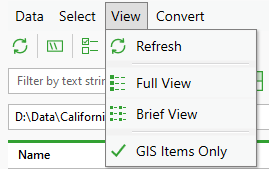
Besides, using the option GIS items only for the active panel, you can manage if you wish to work with GIS related items only (like spatial datasets in the supported formats, map, layer, raster, text, Excel files etc.) or with all available types of data that opened workspace contains.
Basically, with GIS items only option you will see the same content as with the standard Catalog view or pane.
Filtering data
For your convenience, feature classes and items can be filtered in the panels so that you see only the required data.
Following filter are available:
-
By name (free text)
- Only items containing the entered text string in their names will be shown. -
By geometry and data type
- Only feature classes and datasets of the selected geometry and data type will be shown: -
points
-
polylines
-
polygons
-
tables
-
rasters
-
multipoints
-
annotations
-
multipatches
Applied filters can be switched off with the All datasets button on the filter toolbar.

Filters are available for each panel and affect the contents of all workspaces in the panel. The workspaces are filtered by name only.
Sorting data
Workspace contents in the panels can be sorted by any of columns - Name, Extension, Modified, Size. Clicking on the column header you can sort items in the ascending, descending or original order.

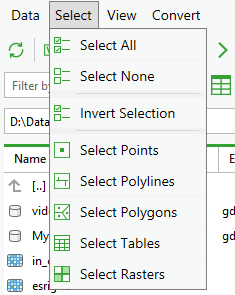
Selecting items
All operations in XTools Pro Catalog are performed with selected items in the active panel. Required items can be selected with a mouse. Use the Shift or Ctrl buttons to select a few items. Besides, using commands from the Select menu you can select feature classes and other items by geometry and data types:
-
points
-
polylines
-
polygons
-
tables
- Please note that TXT, CSV files and XLS, XLSX sheets will not selected. -
rasters
Same way, you can select all items in the active panel, unselect all items (Select None) and invert current selection.
Copying and moving items
The following items can be copied and moved between folders opened in the panels:
-
folders with contents
-
file geodatabases with contents
-
shapefiles
-
DBF tables
-
files
-
toolboxes etc.
The following items can be copied and moved between geodatabases (file and enterprise) opened in the panels:
-
feature datasets with contents
-
feature classes
-
standalone tables
-
raster datasets
The following items can be copied and moved between a geodatabase (file or enterprise) and a folder (and vice versa) opened in the panels:
-
feature classes
-
standalone tables
Items selected in the active panel can be copied or moved using the Copy or Move buttons at the bottom of XTools Pro Catalog or with the F5 or F6 keys.
Notes:
-
Feature classes and standalone tables from geodatabases are copied or moved to the folders as shapefiles and DBF tables (and vice versa). When converting geodatabase feature classes and tables to shapefiles and DBF tables, long field names will be cut, and unsupported fields won't be kept.
-
When copying or moving between workspaces of different types, items with the same names can be rewritten.
At that, you can
copy paths of the selected items to the Clipboard (use Copy path
button  on the toolbar).
Dragging-and-dropping datasets
The selected feature classes and standalone tables can also be dragged-and-dropped:
-
between panels
- The selected items are copied to the target workspace. -
to map views
- The selected items are added to the target map view contents. -
to geoprocessing tools in the Geoprocessing Pane
- The first selected item is added to the parameter string. If the parameter supports multiple datasets, all selected items are added to the parameter strings. Please note that the selected items are not checked to be valid for the parameter before adding. -
to models
- The selected items are added to the target model view as model elements.
You can drag-and drop multiple selected items, holding the first selected item.
Viewing feature geometry
The following selected items can be viewed without adding them to the map:
-
feature classes
-
LYR, LYRX files
-
KML, KMZ files
-
raster datasets
-
MAPX, MPK, MPKX files
-
MXD documents

Usage:
-
Select the required items in the active panel. You can select multiple datasets.
-
Click the View Geometry button at the bottom of XTools Pro Catalog.
-
Zoom in and out using a mouse wheel, or pan to the different part of the viewed data in opened window if required. Features of multiple selected datasets are viewed in a single window.
-
Open more windows to view different datasets in separate windows if required.
-
Close the unnecessary windows after viewing features.
You can also use F3 key for viewing feature geometry.
Please note that the multiple datasets with different spatial reference can be viewed incorrectly in a single window.
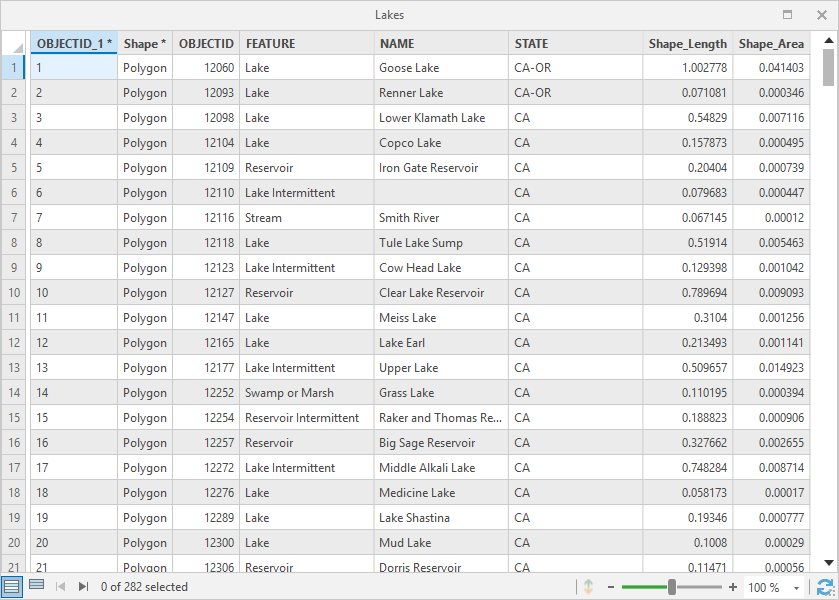
Viewing table records
The following selected table types can be viewed (one at a time):
-
attribute tables
-
standalone tables
-
Excel file sheets
-
text files
Tables viewed in the table view can be scaled as required, besides you can select records, view only the selected records and also sort tables by columns in the ascending, descending or original order.
Usage:
-
Select the required items in the active panel.
-
Click the View Table button at the bottom of XTools Pro Catalog.
-
Select required records, display only selected records in the opened window.
-
Sort records in ascending, descending, or original order if required.
-
Change the table scale if needed.
-
Open more windows to view records of different tables if required.
-
Close the unnecessary windows after viewing table records.
You can also use F4 key or Open Table command from item's context menu for viewing table records.
If multiple items are selected, only the first selected table is viewed.
Renaming items
You can rename any selected item on the active panel. For that, double-click on the required item in the active panel and change its name in the edited string. Confirm the new name pressing Enter or clicking anywhere else in the panel. The name of the selected item is updated after confirming.
You can also use the F2 key or Rename command from the Data menu on the top of XTools Pro Catalog, or Rename command from item's context menu for renaming. In this case if multiple items are selected, only the last selected one can be renamed.
Please note that renaming isn't completed if the edited name is invalid or already exists in the workspace of the active panel.
Deleting items
The selected items of the active panel can also be deleted. To delete the item select it in the active panel, then click on the Delete button at the bottom of XTools Pro Catalog and confirm deleting in the opened window. The workspace of the active panel is refreshed after the item is deleted.
You can also use the F8 or Delete keys, or Delete command from item's context menu for deleting items.
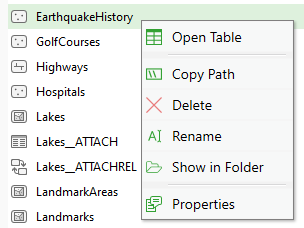
Using item context menu
Using commands from item context menu, you can:
-
open the item table - the same window will be opened using F4 key.
-
copy the item path
-
delete the item
-
rename the item
-
show the item location in the File Explorer - XTools Pro Show in Folder tool will be executed.
-
open the item Properties window - the command is available for geodatabases items (feature dataset, feature class, standalone table, raster dataset) and for folder items (shapefiles and XLS, XLSX sheets).
For multiple selected items Copy path and Delete commands are only available in the items' context menu.
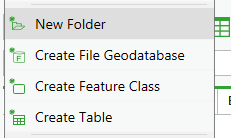
Creating items
In the workspace of the active panel you can create the following items if required:
-
New folder
-
New file geodatabase
-
New feature class
-
New standalone table
The standard corresponding geoprocessing tools are used to create the selected items. At that, the current workspace of the active panel is automatically added as an output workspace.
You can use the F7 key or New Folder button at the bottom of XTools Pro Catalog for creating folders.
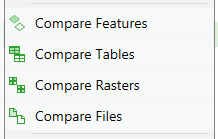
Comparing data
The two following selected items can be compared:
-
feature classes
-
standalone tables
-
rasters
-
files
Usage:
-
Select two items you wish to compare either in the active panel or in different panels. At that, the order in which you select items is important – the first selected item is used as the Base item, the second one – as the Test item.
-
Select the corresponding command in the Data menu on the top of XTools Pro Catalog.
-
Specify required parameters in the opened standard ArcGIS Pro geoprocessing tool. The Base and Test items are added automatically.
-
Run the tool.
The output compare file is added to the selected output workspace after the tool completes comparing the selected items.
Checking data
You can also check the selected feature class geometry. The incorrect geometry can be repaired if required.
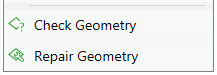
Checking geometry:
-
Select the required feature class in the active panel.
-
Select the Check Geometry command from the Data menu on the top of XTools Pro Catalog.
-
Specify required parameters in an opened standard ArcGIS Pro geoprocessing tool. The selected feature class is added as input dataset automatically.
-
Run the tool.
The output file is added to the selected output workspace after the tool completes checking geometry.
Repairing geometry:
-
Select the required feature class on the active panel.
-
Select the Repair Geometry command from the Data menu on the top of XTools Pro Catalog.
-
Specify required parameters in an opened standard ArcGIS Pro geoprocessing tool. The selected feature class is added as input dataset automatically.
-
Run the tool.
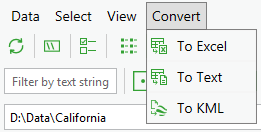
Converting data to other formats
The following conversions are available for one or a few selected datasets:
-
To Excel
- The selected feature classes or standalone tables are exported to a Microsoft Excel file.
For the single selected dataset the XTools Pro Table to Excel geoprocessing tool is used. For the multiple selected datasets the XTools Pro Table to Excel (Multiple) geoprocessing tool is used. -
To Text
- The selected feature classes or standalone tables are exported to a text file.
The XTools Pro Table to Text geoprocessing tool is used. -
To KML
- The selected feature classes or raster datasets are exported to a KML/KMZ file.
The XTools Pro Export to KML geoprocessing tool is used.
The items selected in the active panel are automatically added as input datasets in the corresponding geoprocessing tools.
The output datasets and files are added to the selected output workspace after the tool completes conversion. The output workspace may require refreshing (use the Refresh button on the toolbar of XTools Pro Catalog).
Please refer to the tools help pages for details about valid input datasets and required parameters.