


Export to KML
#updated
Purpose
Export to KML tool is provided for exporting data from ArcGIS to KML/KMZ format.
Description
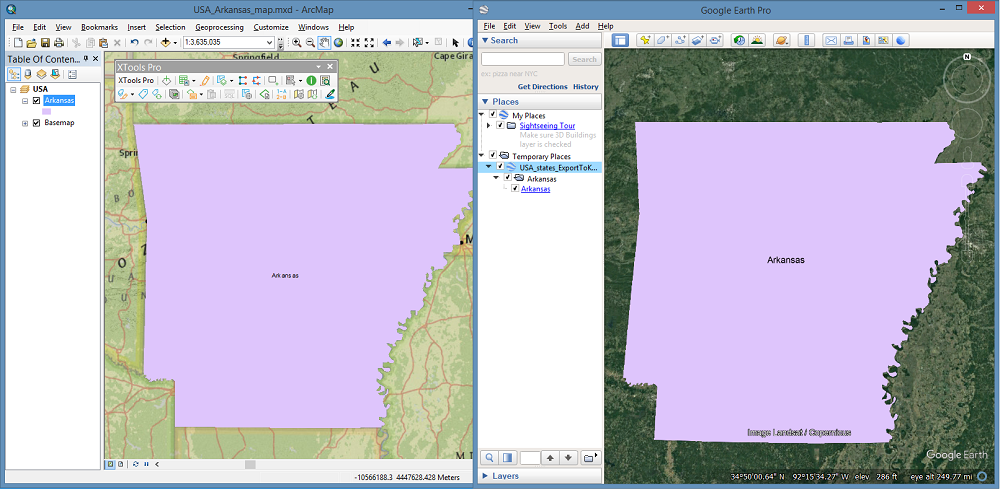
XTools Pro Export to KML tool allows exporting one or several selected vector or raster datasets from ArcGIS to KML/KMZ files. Exported KML/KMZ files can be then used with Google Earth, Google Maps and other desktop or mobile applications and online services.
Exporting data to KML
-
Select the "Export to KML" tool from the XTools Pro menu.
-
Select the input layers that you wish to export.
-
Specify the name and location of the output KML or KMZ file.
-
Select if labels are required and if they will be taken from the field (available for single input layer) or from the layers.
-
If exporting polylines or polygons with labels select where label points should be stored.
-
Select if folders should be created in the output KML file and specify field to group features into folders. This option is available for single input layer only.
-
Specify extraction boundaries if required.
-
Specify features altitude options if required.
-
Select if time properties are required and select one or two fields with time values.
-
Select output raster format (PNG or JPEG).
-
Press Run to export data to KML.
Selecting input and output data
New version of Export to KML tool allows exporting multiple input layers. By default the layers selected in the TOC window will appear in the Input features list. At that, any other layer from the TOC or any dataset from the disk can be selected.
Default output KML/KMZ file will be automatically suggested for the output file, this can be changed to any other appropriate file and folder on the disk.
Creating labels
If you wish to have labeled features in the exported KML file, for example, in Google Earth there are two options provided:
-
Label by field (available for single input layer only).
in this case select an appropriate attribute field from the list
-
Use layer labeling
with this option selected the current layer labeling will be applied. At that, please note that KML format provides limited capabilities to the labels formatting. While you may apply labels created from a few fields, basically, only the font size and color properties may be preserved, all other labels settings will be disregarded.
Creating label points
If you wish to have polyline or polygons features labeled in the exported KML file there are following options available for storing label points:
-
Separate KML file
label points will be saved in a separate KML (KMZ) file
-
KML file folder
label points will be stored in a separate folder within the output KML file
-
Merged with features
label points will be merged with the exported features
With the latter option there will be no separate labeled pins generated while the first two options will provide the pins allowing to manage features and labels separately.
Creating folders
There is an option provided for creating folders in the output KML files. Classifying input features by a field and creating corresponding folders allows you to have separate folders for each different type of symbology. For example, you can color code cities by the state (or county) field, and as a result, you will be able to turn on and off whole different states (or counties) in Google Earth application. Leave this field empty if you don't need folders in the output KML file.
If several input layers are selected to export, separate folder will be created by default for each of input layers.
Selecting extraction boundaries
A portion of the input layer features can be exported to KML file. It is possible to limit this portion specifying the required extraction boundaries. The boundaries can be define the following ways:
-
By selected extent
-
By selected features in a polygon layer
Specifying altitude values and mode
Exported features can be displayed as 3D features in KML file.
Altitude can be used from Z coordinates (for 3D input features only), from selected numeric attribute field (for single input layer only) or as constant value.
At that, altitude mode can be used as Absolute, set as Relative to ground or Clamped to ground:
-
Clamped to ground
This is the default altitude mode for elements when not otherwise specified and when no altitude is provided in the tag. -
Relative to ground
Sets the altitude of the element relative to the actual ground elevation of a particular location. If the ground elevation of a location is exactly at sea level, and the altitude for a point is set to 9 meters, then the placemark elevation is 9 meters with this mode. However, if the same placemark is set over a location where the ground elevation is 10 meters above sea level, the elevation of the placemark is then 19 meters. -
Absolute
Sets the altitude of the element exactly above sea level, regardless of the actual elevation of the terrain beneath the element. For example, if you set the altitude of a placemark to 10 meters with an absolute altitude mode, the placemark will appear to be at ground level if the terrain beneath is also 10 meters above sea level. If the terrain is 5 meters above sea level, the placemark will appear elevated above the terrain by 5 meters.
Altitude units can be meters or feet.
Finally, you can select Extrude features option to extrude features as 3D objects with sides connecting features with the Earth's surface.
Using time properties
You can use time properties for the input features and add a time slider to the output KML file. The following options are available:
-
Time properties from one field
time values are used from one selected date attribute field (for single input layer only). -
Time properties from two fields
start time and end time values are used from two selected date attribute fields (for single input layer only). -
Use layer time properties
the current layer time properties will be applied. Please note that the time interval or time zone specified for the layer aren't taken into account.